Medical Device Enclosures | 5 Tips for Design Success
We live in a world that is increasingly dominated by electronic devices. Between industrial applications, consumer devices, and everything Smart – phones, watches, speakers, homes – the electronics industry is projected to continue growing at a compound annual growth rate of roughly 5.6% over the next 5 years. As the demand for electronics grows, so too does the demand for enclosures to house and protect the circuit boards inside them. At Simbex, decades of experience designing integrated electromechanical systems have given our team a wealth of knowledge in medical device enclosure design. Whether you’re designing an industrial control panel or the next wearable medical device, our team at Simbex can help you succeed. The principles in this article are a few of the keys to success that will help to ensure the design process yields a great product.
1. FDA Design Controls | Quality Requirements = Quality Product
As the saying goes, “garbage in, garbage out.” Defining requirements up front is the first step to creating a quality product. At Simbex, we follow FDA design controls, and this starts with design input requirements. Are we designing a medical device enclosure? If so, we probably need to follow IEC 60601 standards. Will it come in contact with patient tissue? We’ll need to meet biocompatibility standards. Will it be used in a Hospital environment? We’ll need to make it easy to clean and disinfect, as well as resistant to water ingress. What other components does the enclosure need to interface with? Better include corresponding mounting features.
Before even looking at a CAD program, engineers should be sitting down with all of the stakeholders and asking these types of questions to make sure they understand what they’re designing and the customer understands what will be delivered. Throughout the product definition process, it’s important keep an open mind and focus on the “what” rather than the “how.” This means temporarily abandoning preconceived notions and focusing only what the product needs to do. For example, it may turn out that requirements can be met using an off-the-shelf or slightly customized enclosure rather than spending thousands on a custom molded design. It can be tedious, but starting the design process with detailed, testable requirements is the best way to avoid unpleasant (and costly) surprises.
2. Prototype Enclosure Designs Early
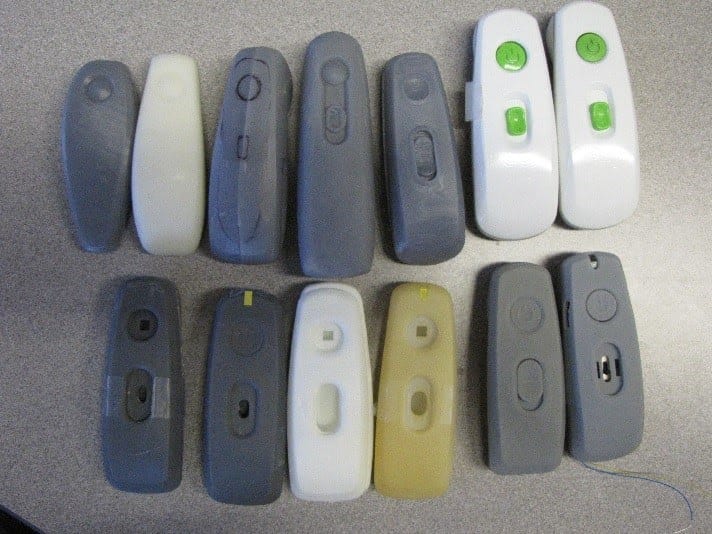
It has never been easier or quicker to get prototypes produced. Between CNC machining and 3D printing, it seems like every other booth at trade shows is another rapid prototyping company. Engineers should use all of the tools available to experiment and test high risk aspects of the design early in the process, but also recognize that costs can quickly add up. If space is a major constraint, a basic model of the enclosure’s footprint can be used to get a sense of fit. If ergonomics is a factor, sparse infill 3D prints are a great way to get concept samples in the hands of stakeholders. Even 1:1 scale prints and scotch tape can be surprisingly useful.

Of course, one should always pay attention to the accuracy of the prototypes before drawing conclusions; a lot can be learned from a “pretty close” prototype, but the deficiencies of that model (3D print vs injection molded tolerances, for example) should always be considered before making changes. The detail required in a given prototype will likely be dictated by the phase of the project; an Alpha prototype would focus on high-risk, core functionality without much attention paid to size and shape, whereas a Beta prototype would likely be more representative of final product, and Pre-Production, as close as possible to production components. Especially for molded parts, the more information and testing that can be done up front, the lower the risk going to production, and the better the end product will be.

3. Have a Plan for Sealing
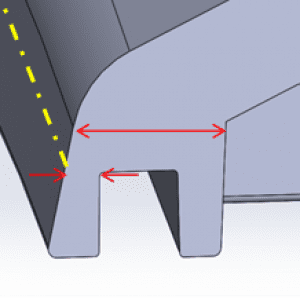
Ingress protection can be a significant challenge for any medical device enclosure design. Water is a tenacious foe and will seep into any crack or crevice in the enclosure. Gaskets and o-rings are tried and true methods of providing a seal, but the gland geometry required for them can often make it difficult to maintain proper wall thicknesses in an injection molded part. Ultrasonic welding is another great option in terms of seal quality, but it eliminates any chance of servicing the product if it fails. If a certain IP rating is required, the designer should understand what that means and have a plan for how to achieve it within the constraints of the other requirements. This way, they can build their design around that concept and avoid compromises in the final DFM process.
4. Understand Your Tolerances
This goes for any design, but is especially important for injection molded components due to the large capital investment involved. Looking at parts in their ideal form in the vacuum of a CAD screen can be deceiving, and it’s important to be aware of how part-to-part variation can affect the final fit of the device. The designer should know the expected range of the critical dimensions on any part they’re interfacing with and should design the mating features accordingly. On the flip side, they should carefully consider the tolerances specified on their own drawings. They should be familiar with the typical tolerance range of the material they’re working with, and also remember that tight tolerances and inspection dimensions directly add cost in tooling and labor. Finally, if there’s ever doubt, it’s always best to start with extra clearance in the plastic; it’s easier to remove metal from the mold to tighten up the plastic than it is to add it back if things are too tight right out of the gate.
5. Get to Know Your Manufacturer
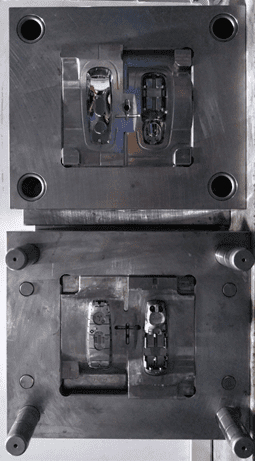
Again, being familiar with the manufacturer is important for any production product, but it is especially important for injection molding due to the amount of up-front engineering and capital investment. As an engineer designing injection molded parts, one should be quite comfortable with using appropriate draft, maintaining acceptable wall thickness, rib thicknesses, and boss geometry. However, chances are slim a design engineer will have as much experience with the effects of those design considerations as the people turning CAD into plastic every day, and rare is the occasion when a design doesn’t require bending at least one of those rules to make the product do what it needs to. This is where it’s invaluable to get the molder involved earlier rather than later. They can advise on how to meet requirements without causing headaches for manufacturing, and most companies will be happy to work together on a design and help with DFM. Ultimately, it’s in their interest to help, as they are more likely to get the business, and the end product will be easier for them to produce (and therefore cheaper for everybody involved). It pays to have a good relationship with the manufacturer.


